programming4us


Windows Server

Windows Server 2008 R2 and Windows 7 : Deploying Branchcache (part 3)

- Free product key for windows 10
- Free Product Key for Microsoft office 365
- Malwarebytes Premium 3.7.1 Serial Keys (LifeTime) 2019
4/24/2012 3:21:33 PM
After creating the new template, you will need to configure your domain for autoenrollment. If you have already deployed Active Directory Certificate Services for other PKI-dependent applications, you may have already enabled this setting. If not, it can be done by performing the following:
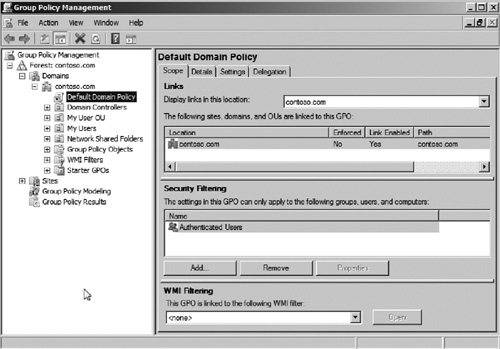
1.
Log on to a domain controller and open Group Policy Management from Start | Administrative Tools | Group Policy Management.

2.
Expand the nodes Forest | Domains | <your domain name> (see Figure 15).

Figure 15. Editing Default Domain Policy.

3.
Right click the Default Domain policy and select Edit.
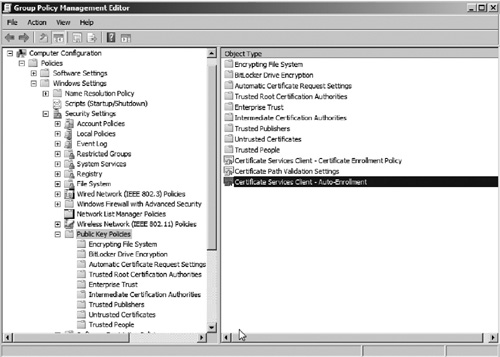
4.
Select the node Computer Configuration | Policies | Windows Settings | Security Settings | Public Key Policies.

5.
Open the policy object Certificate Services ClientAutoEnrollment as seen in Figure 16.

Figure 16. Public Key Policies.

6.
Select the option Enabled. Then select both Renew expired certificates, updating pending certificates, and remove revoked certificates and Update certificates that use certificate templates options (see Figure 17). Then click OK.

Figure 17. AutoEnrollment Properties.


7.
You can now force autoenrollment to occur on the hosted cache server by logging onto that server and running gpupdate from a command prompt.

After configuring certificates for the hosted cache server, you need to link the certificate to BranchCache. This is done by obtaining the SHA-1 hash from the server’s certificate and then using the netsh command to link the certificate. To complete this process, perform the following:
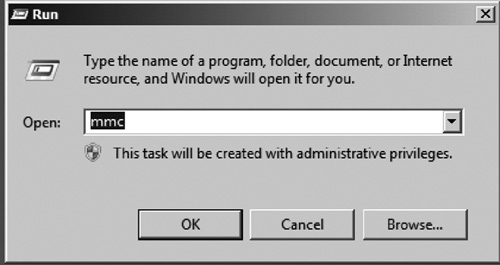
1.
Open a new mmc console by opening a new dialog from Start | Run. Then type mmc in the run prompt and click OK (see Figure 18).

Figure 18. Open new MMC console.


2.
From the new mmc console, go to File | Add/Remove Snap-in....
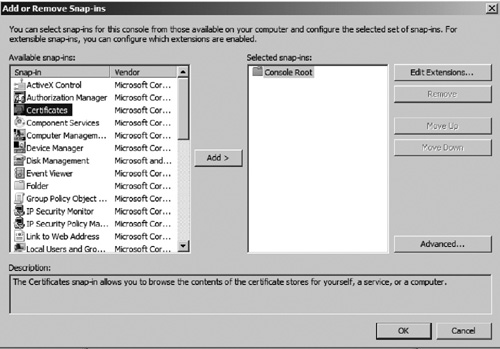
3.
Add the Certificates snap-in from the options as seen in Figure 19.

Figure 19. Add Certificates snap-in.

4.
When prompted whether you would like to manage certificates for user, computer, or service, select the Computer option and then choose Local Computer.
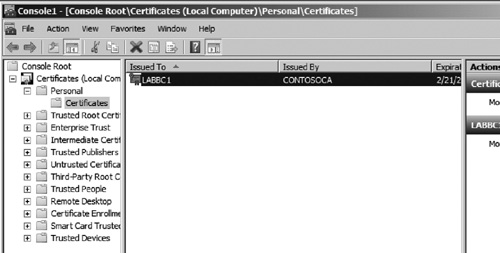
5.
From the MMC console, expand the nodes Certificates | Personal | Certificates. Then open the server certificate as seen in Figure 20.
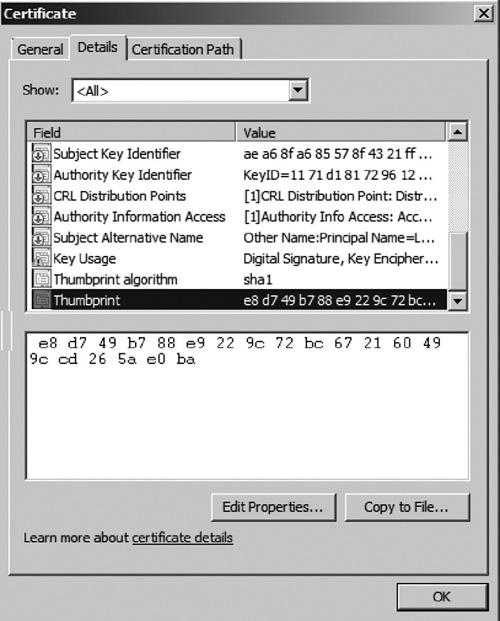
Figure 20. Certificates MMC console.

6.
Select the Details tab in the Certificate window.

7.
Scroll through the fields in the details view and select the Thumbprint field as seen in Figure 21.

Figure 21. Server Certificate Thumbprint.


8.
Copy the SHA-1 hash by selecting the hex-formatted number and using the Ctrl-C keystroke.
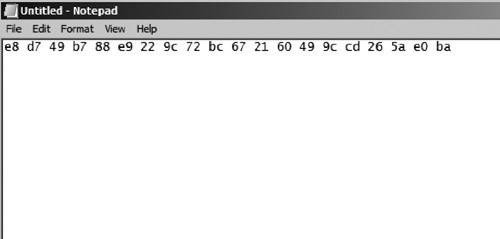
9.
Open Notepad and paste the SHA-1 hash to verify whether it has been copied correctly (see Figure 22). Correct the formatting of the hash by removing all the spaces creating one long hexadecimal number. This is the number we will need to link the certificate to BranchCache.

Figure 22. SHA-1 Hash.


10.
Open a command prompt on the hosted cache server and enter the following command netsh command which includes the SHA-1 hash we copied from Step 9. netsh http add sslcert

ipport=0.0.0.0:443
certhash=e8d749b788e9229c72bc672160499ccd265ae0ba
appid={d673f5ee-a714-454d-8de2-494e4c1bd8f8}.

You have now successfully completed the process of setting up the BranchCache hosted cache server. As clients begin caching files locally, they will be saved in the cache of this server. Now, you only need to configure client computers to use the hosted branch cache. This can be done on a Windows 7 client by using the netsh command: netsh branchcache set service mode=HOSTEDCLIENT. You can additionally update multiple Windows 7 clients to use the hosted cache by deploying a GPO which can perform the same functions.

Other -----------------
- Windows Server 2003 : Managing Daily Operations - Using the AT Command & Using cron
- Windows Server 2003 : Managing Daily Operations - Delegating Control & Using Task Scheduler
- Windows Server 2003 : Auditing Events (part 2) - Setting the Size of Event Logs
- Windows Server 2003 : Auditing Events (part 1) - Audit Settings for Objects
- Windows Server 2003 : Using the Secondary Logon
- Windows Server 2003 : Using the Microsoft Management Console - Creating an MMC-Based Console with Snap-Ins
- Installing Windows Small Business Server 2011 : Selecting Network Components (part 2) - Preparing for the Installation
- Installing Windows Small Business Server 2011 : Selecting Network Components (part 1) - Selecting an Internet Service Provider
- Planning a Windows SBS 2011 Deployment
- Windows Small Business Server 2011 : A Networking Primer - Understanding Domains
- Windows Server 2008 : Using wbadmin (part 2) - Backing Up & Restoring Volumes with wbadmin
- Windows Server 2008 : Using wbadmin (part 1)
- Windows Home Server 2011 : Understanding Security Groups & Adding a New User
- Setting Up Your Windows Home Server 2011 Network : Handling Multiple Network Subnets & Making a Remote Desktop Connection to the Server
- Windows Small Business Server 2011 : A Networking Primer - Ethernet/IEEE 802.3 & TCP/IP Basics
- Windows Small Business Server 2011 : A Networking Primer - Networking Hardware
- Windows Server 2008 Server Core : Installing Applications with the MSIExec Utility
- Windows Server 2008 Server Core : Getting System Configuration Information with the SystemInfo Utility
- Setting Up Your Windows Home Server 2011 Network : Troubleshooting Network Problems (part 2)
- Setting Up Your Windows Home Server 2011 Network : Troubleshooting Network Problems (part 1)


Top 10
 
- Microsoft Visio 2013 : Adding Structure to Your Diagrams - Finding containers and lists in Visio (part 2) - Wireframes,Legends
- Microsoft Visio 2013 : Adding Structure to Your Diagrams - Finding containers and lists in Visio (part 1) - Swimlanes
- Microsoft Visio 2013 : Adding Structure to Your Diagrams - Formatting and sizing lists
- Microsoft Visio 2013 : Adding Structure to Your Diagrams - Adding shapes to lists
- Microsoft Visio 2013 : Adding Structure to Your Diagrams - Sizing containers
- Microsoft Access 2010 : Control Properties and Why to Use Them (part 3) - The Other Properties of a Control
- Microsoft Access 2010 : Control Properties and Why to Use Them (part 2) - The Data Properties of a Control
- Microsoft Access 2010 : Control Properties and Why to Use Them (part 1) - The Format Properties of a Control
- Microsoft Access 2010 : Form Properties and Why Should You Use Them - Working with the Properties Window
- Microsoft Visio 2013 : Using the Organization Chart Wizard with new data
- First look: Apple Watch

- 3 Tips for Maintaining Your Cell Phone Battery (part 1)

- 3 Tips for Maintaining Your Cell Phone Battery (part 2)
programming4us programming4us